
What do you suppose the makes us (not just artist type us) absolutely love and crave old photos??? And for us "artzy" type the older, much loved and dingier the better. No matter what kind of art or medium we work in it seems these old tin type, cabinet card, and early hand held B&W cameras find their way into our work. Maybe it's because as they say "inside every artist lives a story teller"?

Tell the truth who among us doesn't squeal with excitement, look both directions to make sure no one else has seen that old beat up velvet photo album just barely sticking out of that box of books, under the stack of old shop rags, underneath that table, shoved back in the corner. Then being as nonchalant as you can muster,to move to stealth mode as you work your way across the garage, hoping no one else has noticed that incredible score of the day! Woooooo who knows it could be filled with amazing family pictures. Ohhhhhh the things I would make if it only did!! :)
Sadly for some of us (that means me) running across an old album is about as close to impossible as you can get. Heck I have yet to find even a single cabinet card. :( So tell me what's a art girl suppose to do????? Hmmmmm Well for me that means I have to make my own vintage and antique photos. After a couple of printer cartridges and a ream or so of paper I've gotten to the point where my printed clip art pictures look pretty darn good. Here let me show you.
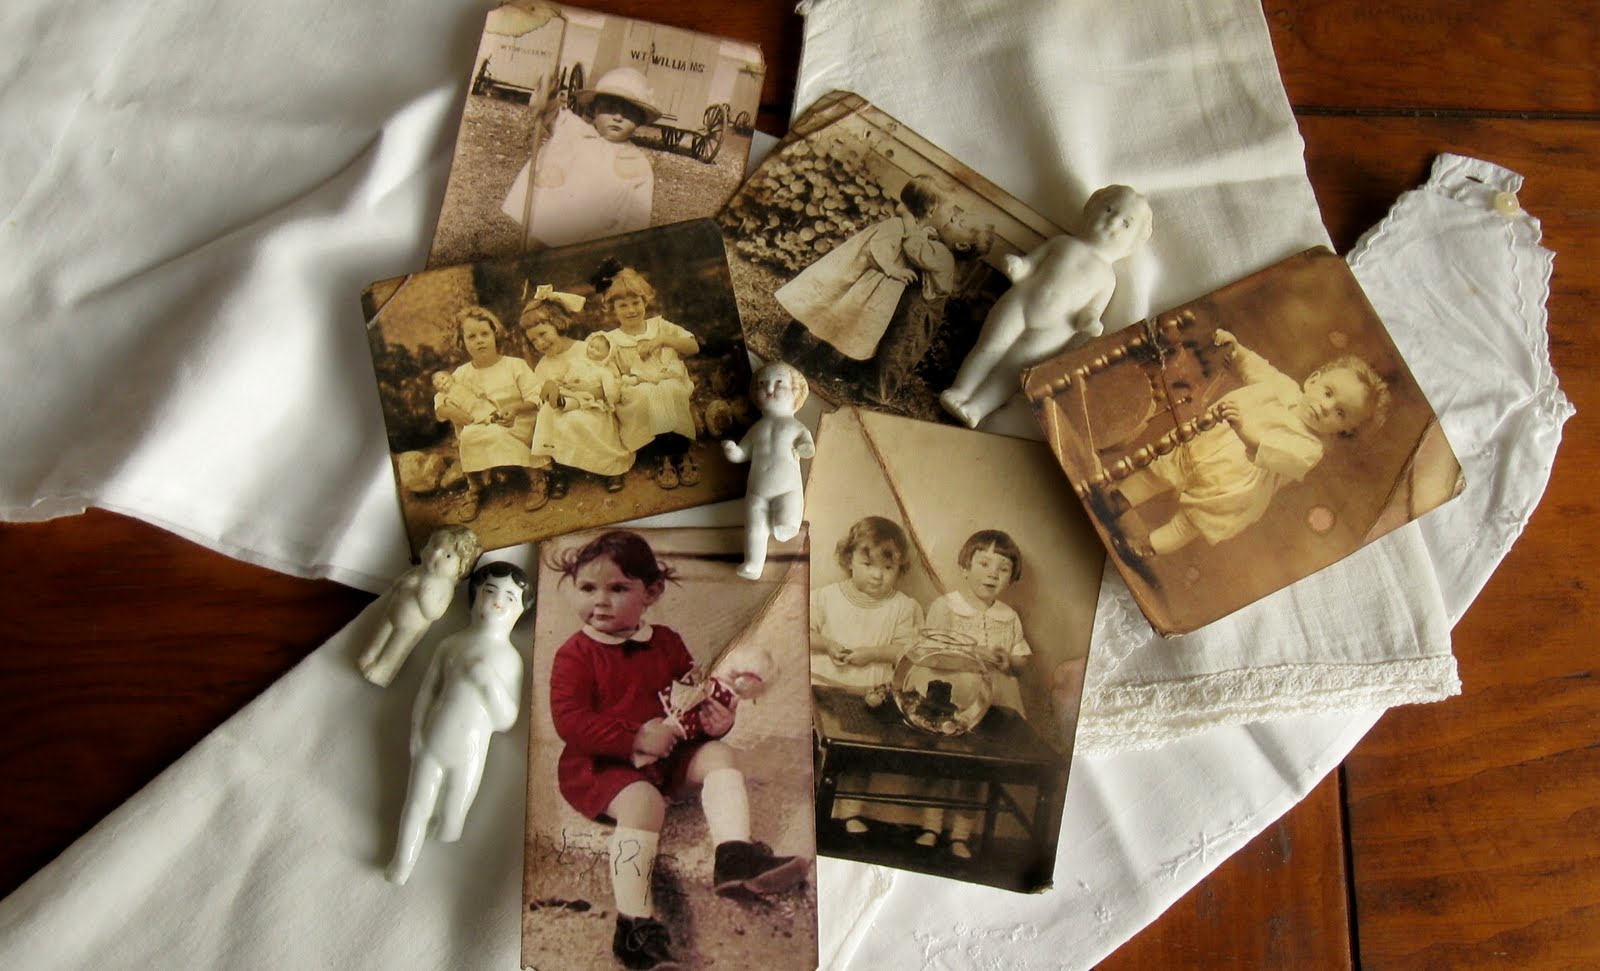
Here are copies of vintage/antique photos I printed on to a good medium weight card stock.I don't have a jet printer so I usually use my normal-best ink settings.

Once I get them cut out the first thing I do is scuff up or pull off the very top of the corners. Those are always the first to go, and if they were ever in an album it's almost impossible to keep the corners from ripping off when you take them out of those little gum corner brackets.

I always go around the edges with some brown stamp pad ink it's a quick way to add instant age but it also hides that it's only paper the pictures are printed on.

I do use the printer to "clean up" the photo a bit. So that the picture is as sharp as it can be in it's aged condition. So if part of the picture has darkened or lightened because of the way it was handled or exposed to light I don't try to remove it or lessen the effect. See where the top half of the bathing beauties is whiten a bit, because it was exposed to sun or strong light for a while??

Once I get the edges and corners aged I can really start to have fun. Old photos always have a life or a history all their own. And lots of times it doesn't have much bearing on what has been photographed. Maybe this little guy's photo was safely kept in the Grandma's family bible, after she saw how the older brothers were teasing their little brother with it. And that's how the tear and creases ended up on it. Are those 2 water spots where ma went to swat then with the wooden spoon while she was doing the dishes.

This one looks like it was taken with one of the first hand held massed produced cameras. The picture paper was thinner and as it aged it takes on a kinda old celluloid look. The edges are fragile because the paper becomes brittle. The prints also have a tendency to fade or wash out and yellow.

What about this one?? If you look really close down on this little sweetie's knee sock you can see a lovely R printed. Look really close and you can make out the PET(R)E of the rest of her name :) Now just how do you suppose that got there, and did she get scolded by Mama for practicing her writing?? And since it's pretty much ruin maybe Auntie Eunice used it to practice her photo tinting.


The last thing I do after creating the wear and tear to match the photo's history is give it a good buffing with my secret patina formula. Yep that good old Kiwi shoe wax. :) Only for this I use the natural or neutral color. This give the pictures that soft subtle sheen of old photographs. Other wise it still looks and feels like clip art copied onto card stock :(

I have to tell you that I have come to enjoy the whole experimenting, aging, layering processes used in creating my own patina,well worn/loved "antiques. I really love the whole challenge of convincingly making whatever material I'm using look and feel like it has naturally aged and has it's own history and story to tell. Hmmmmm must be that old story teller in me any :)
I hope that I didn't bore you guys to much and maybe even gave you an idea or two. If not at least you got to see some pretty cute old photos! I'm off to bed, you kids remember that NOW is always a perfect time to make a bit of art p;)


6 comments:
Pattie, you are a genius!!! Fabulous, thanks for sharing.
Those photos look darn convincing to me.
These are wonderful! The older looking, the better! WTG Big Sis!
Love to you, LW and Babies of Fur!
LS, The Commander and #2
and THIS is why God created artists! It is instinctive to want to share our talents with others. Thanks sister for a lovely tutorial. You do a wonderful job on these.
very cool tips - thanks!
You are an alchemist! I have cabinet cards from my family. I simply can't use them so they sit in a box. I don't even know who some of there are and I still can't part with them. Maybe I should just follow your tips here, can them, and make them old.
That is great info.... I must try it sometimes =)
Post a Comment